
Spotting Leak Signs During a Roof Inspection
Is your roof showing signs of water damage but you’re unsure how to spot the leaks during an inspection? Understanding the indicators of a roof in distress can save you from costly roof repair and replacement down the line. This article will guide you through common leak sources, visual signs of leaks, and when to call a professional roofer for further evaluation. By knowing what to look for, you can better protect your home and ensure your roof remains in good condition.
Key Takeaways
- Regular roof inspections help prevent costly repairs and protect your home from water damage
- Focus on vulnerable areas like flashing and roof penetrations to identify potential leaks
- Promptly address signs of moisture or sagging to maintain your roof’s integrity
- Professional evaluations can provide detailed insights and recommendations for your roof’s condition
- Keep an eye on interior signs like water stains to catch leaks early
Key Takeaways
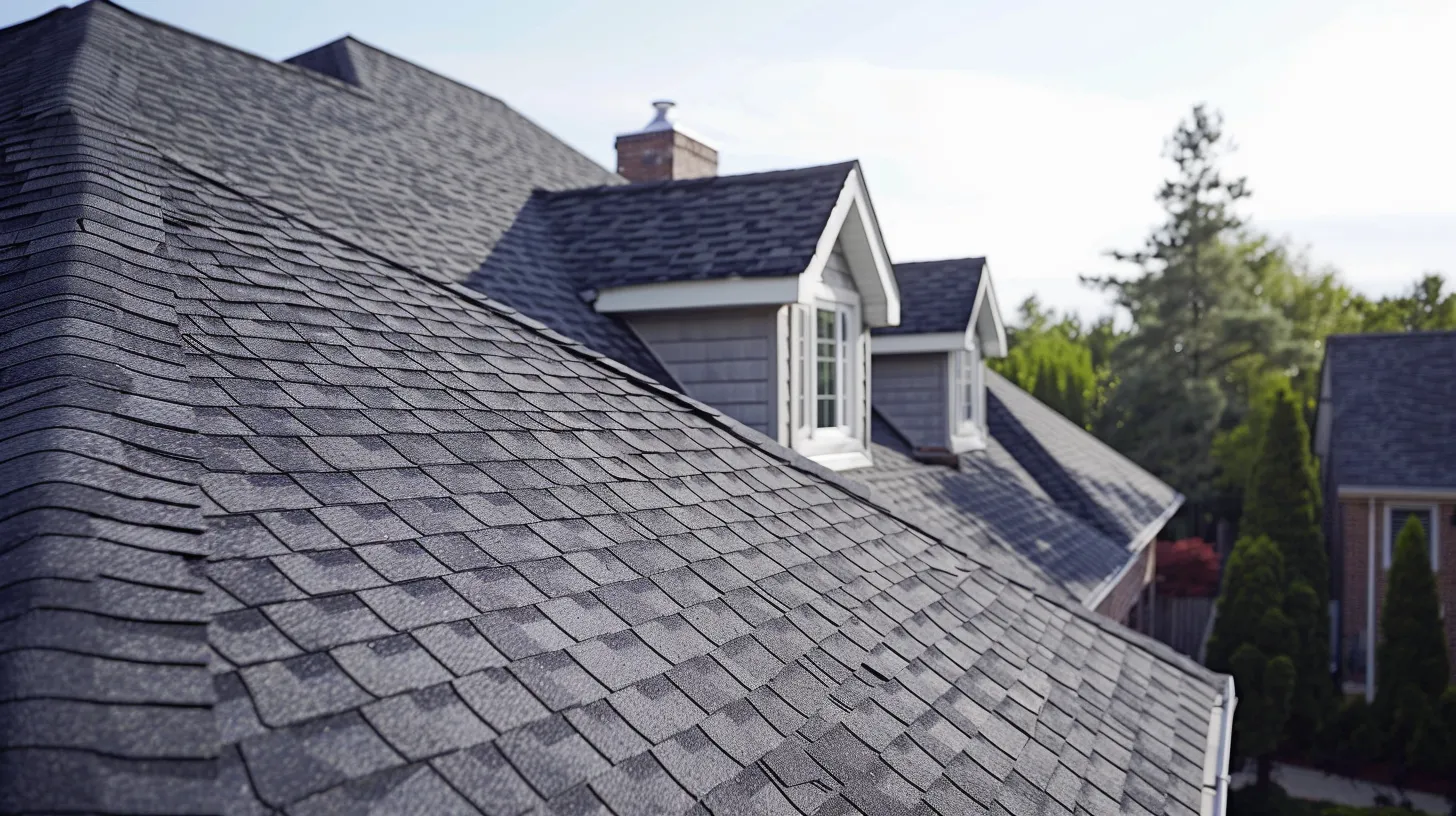
When inspecting your roof, look for signs of leaks around flashing, especially where the roof meets the chimney. This area is often vulnerable, and any gaps or damage can allow water to seep in, leading to potential problems inside your home, often requiring roof repair and replacement.
Check the attic for water stains or mold growth, as these can indicate a leak. Proper ventilation is essential, but visible signs of moisture can mean that water has compromised your roof’s integrity.
Pay close attention to your roof’s surface, particularly after heavy rain or snow. Look for damp spots or sagging areas, as these may signal underlying leaks that need immediate repair to protect your home and maintain your home insurance coverage.
Regular roof inspections can save you from costly repairs down the line. By spotting leak signs early, you can address issues promptly and keep your home safe from water damage:
- Inspect flashing around chimneys and vents.
- Check for water stains in the attic.
- Look for sagging areas on the roof surface.
- Schedule regular roof inspections to ensure integrity.
A roof can hide its secrets well, but knowing the signs of leaks makes the task easier. Let’s look closely at how to spot these indicators during a roof inspection.
Introduction to Identifying Leak Indicators During a Roof Inspection
When conducting a roof inspection, you need to look for signs that indicate potential leaks. Areas like flashing around chimneys and vents are particularly vulnerable to water intrusion. Gaps or deterioration in these sections can lead to major issues inside your home.
According to professional inspectors, checking the attic is also essential. Look for signs of mildew or water stains, as these can signal a leak. Proper ventilation in the attic helps prevent moisture buildup, but visible evidence means you should take action quickly.
After heavy rain or snow, closely examine your roof’s surface. Debris accumulation can hide underlying issues, making it difficult to spot potential leaks. Focus on damp spots or sagging areas, as these can be critical warning signs affecting your home’s integrity.
Regular inspections are vital, especially if your roof is still under warranty. This proactive approach allows you to identify and address problems early, protecting your investment and ensuring a safe environment for your family:
You’ve learned how to spot the signs of a leak. Now, let’s look closer at where those leaks often begin.
Understanding Common Leak Sources in Roofs
One common leak source you should be aware of is the flat roof. Flat roofs can easily collect water, especially during heavy rain, and any pooling can lead to leaks if there are weak spots or damage in the material. Regularly inspecting your flat roof will help you catch problems before they escalate.
Wind can also be a significant factor in causing leaks. Strong winds may lift shingles or membranes, exposing your roofing system to potential water entry. Be sure to check areas where wind might have caused damage, as these can lead to leaks over time.
Skylights are often overlooked but can be vulnerable to leaks as well. Improper installation or deterioration of the seals around skylights can allow water to seep through, causing ceiling stains or mold growth indoors. Keeping an eye on your skylights during inspections is crucial for maintaining a watertight seal.
Finally, inspect your ceilings for any signs of water damage. Stains, discoloration, or peeling paint may indicate that a leak is occurring above, potentially from your roof. Addressing these signs quickly can prevent mold issues and keep your home safe and dry.
Every roof tells a story, shaped by the years it has stood guard. Next, we will uncover the specific places where leaks often begin and how to protect your home from water’s relentless advance.
Understanding Common Leak Sources in Roofs
When assessing your roof, it’s crucial to identify issues with roofing material, as damage can often lead to leaks over time. Recognizing faulty flashing and sealants is equally important, as these areas can compromise your roof’s integrity. Finally, spotting problems around roof penetrations—like vents and chimneys—can help prevent water intrusion caused by environmental factors such as hail or moss buildup. Each of these aspects will be discussed in detail below.
Identifying Issues With Roofing Material
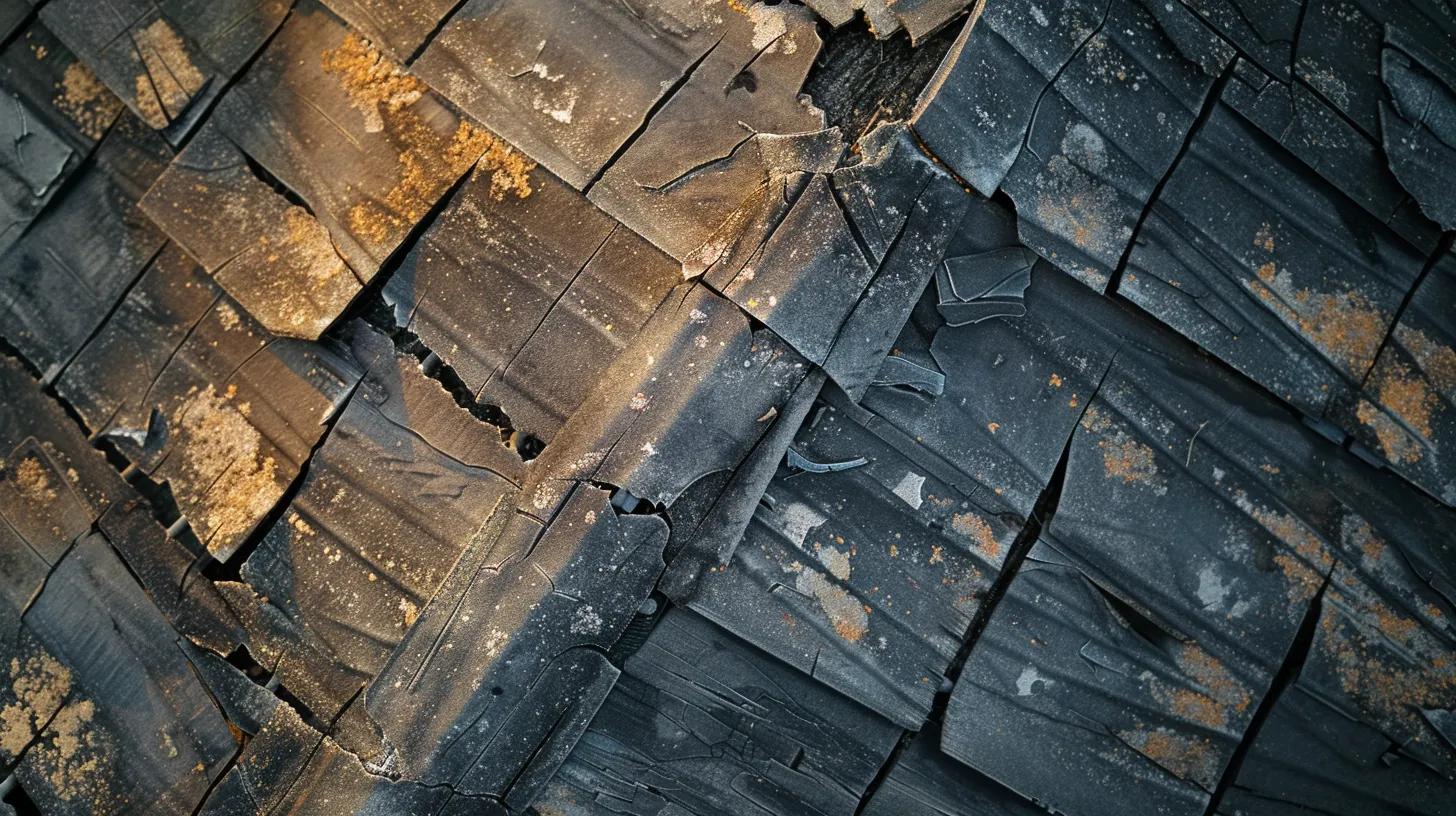
During a home inspection, focusing on your roofing material is key to identifying potential leaks. Look for signs of wear, including cracked or missing shingles, as these damages can lead to water intrusion, especially during heavy rains or melting snow. Pay attention to the condition of the fascia, as deteriorated materials can compromise the overall performance of your roof and contribute to leaks if not addressed promptly.
Another critical area to inspect is where the downspout meets the roof. A clogged downspout can cause water to pool and back up, potentially leading to leaks. Ensuring that your roofing materials are in good condition and that all drainage systems function properly will help reduce the need for costly roof repairs and protect your home from water damage.
Recognizing Faulty Flashing and Sealants
When conducting a roof inspection, pay close attention to the flashing and sealants around your roof. Faulty flashing can create gaps that allow water to enter, leading to leaks and damage inside your home or commercial space. Consider scheduling a free roof inspection to have a professional roof contractor evaluate these areas thoroughly and recommend whether you need to replace any damaged components.
Sealants are equally important, as they provide a barrier against moisture intrusion. Over time, sealants can degrade, resulting in insufficient protection. Regular checks during your roof inspection will help you identify any deteriorated sealants, ensuring your roofing system remains watertight. This preventive approach can protect your investment and prevent costly repairs down the line.
Spotting Problems Around Roof Penetrations
When inspecting your roof, focus on areas around penetrations such as chimneys, vents, and skylights. These spots are common sources of roof damage since materials can deteriorate or shift over time, allowing water to enter your home. A qualified roofing contractor can help you thoroughly assess these areas during a roof inspection, identifying any issues that need timely repair.
During regular roof inspections, pay attention to signs of wear or gaps around roof penetrations. Cracks in the flashing or damaged sealants can lead to leaks if not addressed quickly. By keeping an eye on these critical areas, you can maintain your roof’s integrity and prevent more significant problems down the line:
- Inspect the flashing for cracks or gaps.
- Check sealants for signs of deterioration.
- Look around vents and chimneys for water stains.
Now that you know where leaks often begin, it’s time to take action. Conducting a DIY roof inspection reveals what you might find above your head.
Conducting a DIY Roof Inspection
To effectively conduct a DIY roof inspection, you need essential tools for a thorough assessment, a step-by-step guide for identifying potential leaks, and safety precautions to protect yourself. Understanding these aspects will empower you to inspect your roofs efficiently, minimizing the risk of damage and potentially lowering roof inspection costs. You’ll be better prepared to address any issues before they necessitate roof replacement or become significant problems in commercial roofing structures.
Necessary Tools for a Thorough Inspection
To conduct an effective DIY roof inspection, you’ll need some essential tools focused on roofing safety
Step-by-Step Guide to Inspecting Your Roof
Start your DIY roof inspection by checking for signs of wear and tear that may have resulted from recent storms. Look closely at the shingles for any cracks, missing pieces, or curling edges, which can all indicate that your roof is struggling to maintain its energy efficiency. Any noticeable damage can lead to leaks over time, so it’s essential to address these issues promptly.
Next, evaluate the integrity of the flashing around chimneys, vents, and other roof penetrations. Ensure there are no gaps or deteriorated sealants, as these areas are often vulnerable to leaks. Maintaining these critical components will help protect your home from water damage and extend the lifespan of your roof:
Safety Precautions to Take During Your Inspection
Before starting your DIY roof inspection, ensure you prioritize safety to prevent accidents. Use a sturdy ladder rated for your weight, and make sure it’s placed on even ground. Always keep someone on the ground to assist you and monitor your movements, especially if you’re inspecting hard-to-reach areas like the eaves. A partner can also provide immediate help if you face any difficulties while looking for signs of moisture or potential pest problems.
While inspecting, wear appropriate safety gear, including slip-resistant shoes and a harness if you’re accessing steeper sections of the roof. Be aware of your surroundings and check for any loose shingles or unstable areas that could lead to falls. Remember that a thorough inspection is essential for home improvement, but your well-being should be your top concern. Following these safety precautions will help you conduct a successful inspection without compromising your safety.
As you inspect your roof, keep an eye out for subtle signs that trouble may be brewing. Identifying these visual clues can save you from significant damage down the road.
Visual Signs Indicating Leaks
Check for stains on ceilings and walls, as these are clear indicators of water intrusion. Examine shingles for any damage or missing pieces, as these can lead to leaks, especially during extreme weather conditions. Observe sagging areas in the roof structure, which may signal underlying issues with waterproofing or support. Each of these signs is crucial for maintaining the integrity of your home.
Checking for Stains on Ceilings and Walls
When you check for stains on ceilings and walls, you are looking for clear indicators of water infiltration. Discoloration or streaks often point to leaks which may stem from roof issues or poor drainage caused by ponding water. Ignoring these signs can lead to more severe problems, such as structural damage and pest control challenges that can compromise your home’s foundation.
Addressing visible stains promptly can prevent costly repairs in the future. Take the time to trace the source of any leak, as it may originate from other areas in your home, not just the roof. For instance, persistent dampness may indicate that soil around the foundation traps moisture, making it essential to correct drainage problems to protect your property.
Looking for Damaged or Missing Shingles
Inspecting your roof for damaged or missing shingles is vital in identifying potential leak sources. Look closely at the surface for any cracked or curled shingles, as these can allow water to penetrate your property, leading to significant damage if left unaddressed. Pay particular attention to areas near rafter intersections, where moisture can easily collect, and always note the zip code of your property for future reference, especially if you live in regions like Pittsburgh that experience harsh weather changes.
When shingles are missing or damaged, the risk of leaks increases, making regular inspections essential. If you notice areas where shingles have shifted or where debris, such as leaves, has accumulated, clean these spots promptly to prevent moisture buildup. Addressing these issues early will not only maintain the roof’s integrity but also protect your home from water damage and costly repairs down the line.
Observing Sagging Areas in the Roof Structure
When checking for sagging areas in your roof structure, a flashlight can be your best tool. Look for dips or uneven surfaces, especially in regions where snow or ice dams can accumulate during winter months. These sagging areas often indicate that water may have infiltrated the roof, creating risks of further damage to your home, including potential issues in connected spaces like the bathroom.
As you inspect your roof, pay attention to the valleys where roofing materials meet, as these points are prone to sagging due to moisture retention. If you spot sagging, take action quickly to assess the extent of the issue before it worsens. Regular inspections, combined with timely repairs, can mitigate risks and keep your home safe and dry:
Finding visible signs of leaks is just the beginning. To fully understand the issue, a careful inspection of the flashing and seals will reveal the true source of the problem.
Detailed Inspection of Flashing and Seals
During your roof inspection, carefully examine the flashing and seals as they play a crucial role in preventing leaks. Look for any signs of gaps or deterioration that could allow water to seep in, especially around areas where your roof meets siding or other structures.
Using infrared technology can enhance your inspection process. Infrared imaging helps you detect temperature variations, which may indicate moisture presence behind the flashing, revealing potential leak points that aren’t visible to the naked eye.
Ensure that the seals around chimneys, vents, and other roof penetrations are intact. Damaged or worn-out seals can compromise your roof’s effectiveness, leading to water intrusion and structural issues over time.
Take the time to address any identified issues with flashing and seals during your inspection. Timely repairs can prevent costly water damage and ensure your roofing system functions correctly, preserving the integrity of your home.
Water can find its way through the smallest gaps. Understanding how to check your roof’s flashing and seals will safeguard your home from damage.
Detailed Inspection of Flashing and Seals
Evaluating the flashing and seals on your roof is crucial in preventing leaks. You will learn about the various types of flashing and their significance in maintaining your roof’s integrity. Look for signs of deteriorating sealant and assess the condition of chimney and skylight flashing, as these areas are common points of water intrusion.
Types of Flashing and Its Importance
Flashing is an essential component of your roofing system, designed to direct water away from critical areas and prevent leaks. There are several types of flashing, including step flashing, counter flashing, and chimney flashing, each serving a specific purpose. For instance, step flashing is typically used around chimneys and walls, while counter flashing is installed above step flashing to create a continuous barrier against water intrusion.
Understanding the importance of these flashing types in your roof inspection can help you identify potential weaknesses. Damage to flashing can lead to significant leaks and costly repairs. Regularly checking the condition of your flashing, especially at joints and penetrations, will ensure your roof remains watertight and protected from the elements:
Signs of Deteriorating Sealant
During your roof inspection, signs of deteriorating sealant often manifest as cracks, peeling, or discoloration around critical areas like chimneys and vents. When you notice these issues, it’s essential to understand that weakened sealant can lead to water intrusion, which may compromise your roof’s functionality. Pay close attention to any gaps where sealant used to be intact, as these fractures are warning signs indicating the need for immediate repair to prevent potential leaks.
Another common indicator of failing sealant is water stains or deterioration of the surface around the seams and edges. If you identify these signs, act quickly to reapply fresh sealant or contact a professional to assess the situation. Timely intervention not only protects your home’s interior from water damage but also extends the lifespan of your roofing system, maintaining its durability against the elements.
Assessing Chimney and Skylight Flashing Integrity
Assessing the integrity of chimney and skylight flashing is essential in preventing water intrusion during a roof inspection. Look for any signs of damage, such as cracked or deteriorated flashing and worn sealants, which can indicate areas where moisture might enter your home. Properly installed flashing should create a tight barrier that directs water away, safeguarding both your roof and interior living spaces.
In addition to visual inspections, consider the surrounding areas for water stains or mold, which may suggest compromised flashing. Regularly checking and maintaining these critical components will ensure the longevity of your roof, providing peace of mind against leaks. To effectively manage this aspect of roof care, keep in mind the following key actions:
- Inspect flashing for cracks or gaps.
- Check sealants for signs of deterioration.
- Look around chimneys and skylights for water stains.
After ensuring the flashing and seals are in top condition, it’s time to think about the changing seasons. Each season brings its own challenges, making regular inspections even more vital for roof health.
Seasonal Considerations for Roof Inspections
Preparing your roof for the winter is crucial. In this section, you’ll learn about how to effectively assess your roof as fall approaches, ensuring it’s ready for harsh weather. After winter storms, a thorough spring checkup helps identify potential damage caused by snow and ice. Regular inspections during rainy seasons are essential for spotting leak signs early and maintaining your roof’s integrity.
Fall Preparation for Winter Weather
As fall approaches, preparing your roof for winter weather is essential to prevent leaks and maintain the integrity of your home. During this time, you should inspect your roof thoroughly, focusing on areas that might trap debris, such as valleys and gutters. Cleaning these areas reduces the risk of water pooling, which can lead to leaks as temperatures drop and precipitation increases.
Additionally, check the condition of your flashing and seals around chimneys, vents, and other penetrations. Ensuring these components are in optimal condition will protect your home from water intrusions during the harsh winter months. By addressing these concerns now, you can avoid the stress and expense of emergency repairs when severe weather strikes.
Spring Checkup After Winter Storms
After winter storms, it’s crucial to conduct a thorough spring checkup on your roof to spot any hidden leak signs. As temperatures rise and snow melts, water can seep into your roofing materials, leading to potential damage. By carefully inspecting for sagging areas, damaged shingles, or compromised flashing, you can address issues early and prevent costly repairs.
During your spring inspection, focus on assessing the integrity of areas susceptible to leaks
The Importance of Regular Inspections During Rainy Seasons
Regular roof inspections during rainy seasons are essential for identifying potential leak signs that may not be apparent during dry periods. Heavy rainfall can exacerbate existing roof issues, such as damaged shingles or deteriorated flashing, making it crucial to assess your roof’s condition proactively. By monitoring your roof during this time, you can mitigate the risk of water damage and protect your home from costly repairs.
After heavy rain, it’s important to inspect not only the roof but also the interior of your home for any new signs of moisture. This includes checking ceilings and walls for stains or discoloration that could indicate a roof leak. Addressing these problems promptly allows you to maintain the integrity of your home and ensure a safe living environment:
- Inspect shingles for damage or missing pieces.
- Check ceilings and walls for signs of water stains.
- Examine flashing and seals around roof penetrations.
Even with careful inspections, some issues remain hidden from view. Knowing when to call a professional can make all the difference in protecting your home.
When to Call a Professional for Further Assessment
Recognizing signs indicating major issues is crucial for maintaining your roof’s integrity. Understanding the cost of professional inspections can help you budget for necessary maintenance. Additionally, knowing how to choose a qualified roofing expert ensures you receive the best service. This section offers practical insights to assist you in making informed decisions regarding your roofing needs.
Signs Indicating Major Issues
If you notice persistent water stains on your ceilings or walls, this could indicate a significant roof leak that requires immediate attention. These stains often signal that water is seeping through your roofing materials and compromising the structure of your home. Ignoring these signs can lead to more extensive damage, such as mold growth or issues with the integrity of your home’s framework, making it crucial to consult a roofing professional as soon as possible.
Another major warning sign is the appearance of sagging areas on your roof, indicating potential issues with the support structure beneath the roofing materials. Sagging occurs when moisture accumulates, weakening the materials and putting your home at risk. If you observe this condition, it’s advisable to call a qualified contractor for a thorough assessment and necessary repairs to prevent further complications and ensure your roof remains reliable.
Understanding the Cost of Professional Inspections
Understanding the cost of professional roof inspections is essential for homeowners. Typically, you might expect to pay between $150 and $500 for a thorough evaluation, depending on your location, the size of your home, and the specific services offered by the contractor. Investing in this assessment can prevent expensive repairs later by identifying potential leak signs early, giving you peace of mind regarding your roof’s condition.
When seeking out a professional, inquire about what the inspection entails. Many reputable roofing contractors offer detailed reports, including photographs and recommendations for necessary repairs. This transparency allows you to make informed decisions about your roofing needs and helps avoid surprises when it comes to long-term maintenance costs:
How to Choose a Qualified Roofing Expert
When choosing a qualified roofing expert, start by seeking out professionals who have verifiable experience in roof inspections and repairs. Look for contractors with positive reviews from previous clients in your area, as this will give you insight into their reliability and the quality of their work. It’s also beneficial to inquire about their certifications and licenses to ensure they meet industry standards, which can provide peace of mind during your roof inspection process.
Additionally, don’t hesitate to ask for detailed estimates that outline the services provided and any potential costs associated with repairs. A reputable roofing expert will be transparent about their services and willing to offer a thorough assessment of your roof’s condition. Establishing clear communication at the onset builds trust and makes it easier for you to address any concerns about spotting leak signs during your roof inspection.
When uncertainty lingers, trust your instincts. The next steps could change everything; knowing how to proceed is essential.
Conclusion
Understanding how to identify leak signs during a roof inspection is essential for maintaining your home’s integrity. By focusing on vulnerable areas such as flashing, chimneys, and vents, you can spot issues before they escalate into costly repairs.
Regularly checking for water stains in your attic and signs of sagging in your roof structure allows you to take preventive measures. This proactive approach helps protect your investment and ensures a safe living environment for your family.
Consider scheduling professional inspections to enhance your understanding of your roof’s health. Experienced roofing contractors can provide valuable insights and help identify problems that you may overlook during a DIY inspection.
Ultimately, keeping a close eye on potential leak sources will improve your home’s longevity. With diligence in inspecting and maintaining your roof, you ensure that your home remains a safe, comfortable space.
Frequently Asked Questions
What are the key indicators of roof leaks during an inspection?
During a roof inspection, key indicators of leaks include water stains on ceilings, damp insulation, mold growth, missing or damaged shingles, and rust on metal components. Addressing these signs promptly can help prevent costly repairs.
How can I perform a DIY roof inspection effectively?
To perform a DIY roof inspection effectively, examine shingles for damage, check gutters for debris, assess flashing around chimneys and vents, and look for any signs of leaks or water stains inside your home.
What common sources cause roof leaks?
Common sources of roof leaks include damaged shingles, clogged gutters, improperly sealed flashing, and wear around vents or chimneys. Regular inspections and maintenance can help prevent these issues and protect your home’s interior from water damage.
When should I consider hiring a roofing professional?
Consider hiring a roofing professional if your roof shows signs of leaks, water damage, missing shingles, or curling edges. Timely intervention helps prevent costly repairs and ensures your home’s protection and longevity.
How do seasonal changes affect roof inspections?
Seasonal changes significantly impact roof inspections, as temperature fluctuations can reveal hidden issues like leaks or weakened materials. Heavy snowfall or strong winds may exacerbate existing problems, necessitating timely evaluations to ensure the integrity of your roof.
Conclusion
Spotting leak signs during a roof inspection is crucial for maintaining your home’s integrity and preventing costly repairs. By regularly examining areas such as flashing, chimneys, and attic spaces for signs of moisture or deterioration, you can address issues before they escalate. Timely action protects your home from water damage and ensures a safe living environment for your family. Prioritize regular inspections and proactive maintenance to enhance your roof’s longevity and reliability.