Effective Ways to Inspect Roof Safeguards After Storms
Roof Safeguards: Inspecting After Weather Hits
Do you worry about the condition of your roof after a storm? In this post, you will learn how to conduct a careful roof inspection, document damage clearly, and plan for timely repairs. You will also see how consulting with roofing professionals can ease your concerns and help manage insurance claims. This guide tackles common problems faced by homeowners, providing you with clear steps to protect your home and avoid costly repairs.
Key Takeaways
- inspect your roof after severe weather to catch early signs of damage
- document visible damage with clear photos and detailed notes
- use professional evaluations to plan accurate repair strategies
- review home insurance details to support storm damage claims
- schedule regular inspections and maintenance for long-term roof protection
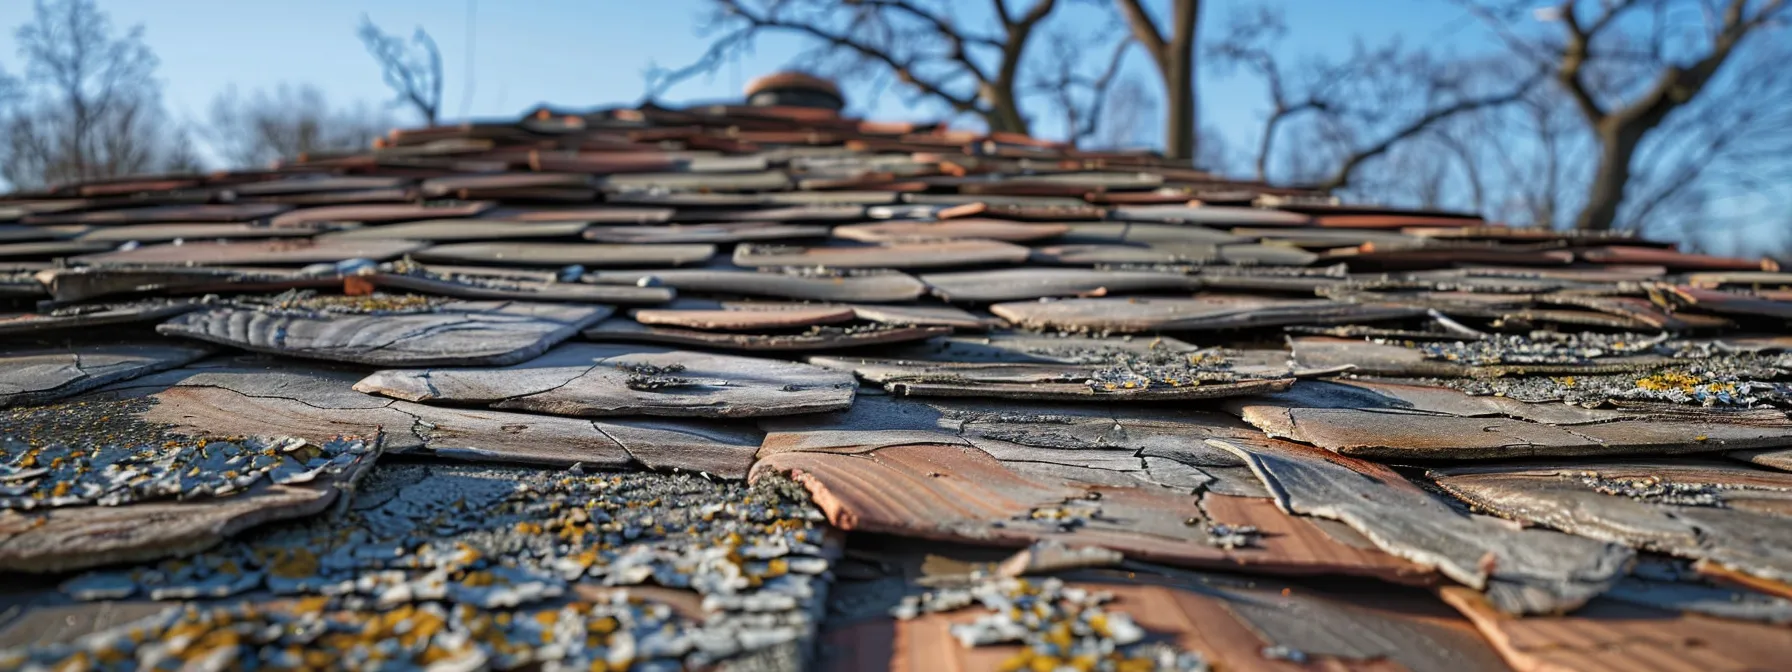
You learn that roofing inspections are crucial after a winter storm to assess any damage to wood and slate components. This evaluation helps you understand potential home insurance claims more thoroughly:
You understand that careful roofing inspections after severe weather can pinpoint issues with wood supports. You also note that inspecting slate tiles helps you prevent further deterioration.
You see that a thorough review of roofing conditions supports your home insurance claims. You pay attention to evident issues from a winter storm that may affect the overall safety of your roof.
You remember that scheduling a professional inspection after a winter storm can save you costly repairs. You also remain proactive in maintaining your roof’s integrity and clarifying home insurance details.
The key points set the stage for what’s ahead. You now see why knowing roof damage matters as we explain common types of storm damage.
Understand Common Types of Storm Damage to Roofs
You learn to spot storm damage by identifying issues from high winds, hail impacts, and leaks that lead to water problems. You focus on safety during a roof inspection and know that factors like ice dam, snow, and severe weather can weaken your roof’s structure, prompting the need for a closer look at each concern.
Identify Damage From High Winds
You observe that high winds can loosen or tear off roofing material, leaving debris scattered on your lawn and around downspouts. This damage can alter construction integrity, which may lead your insurance company to reassess the roof replacement cost if not promptly addressed.
You need to check for missing shingles or warped materials after a windy day. Detecting these issues early helps you plan a repair strategy that minimizes further damage and avoids unexpected financial burdens with your insurance company, ensuring that your roof’s stability remains intact.
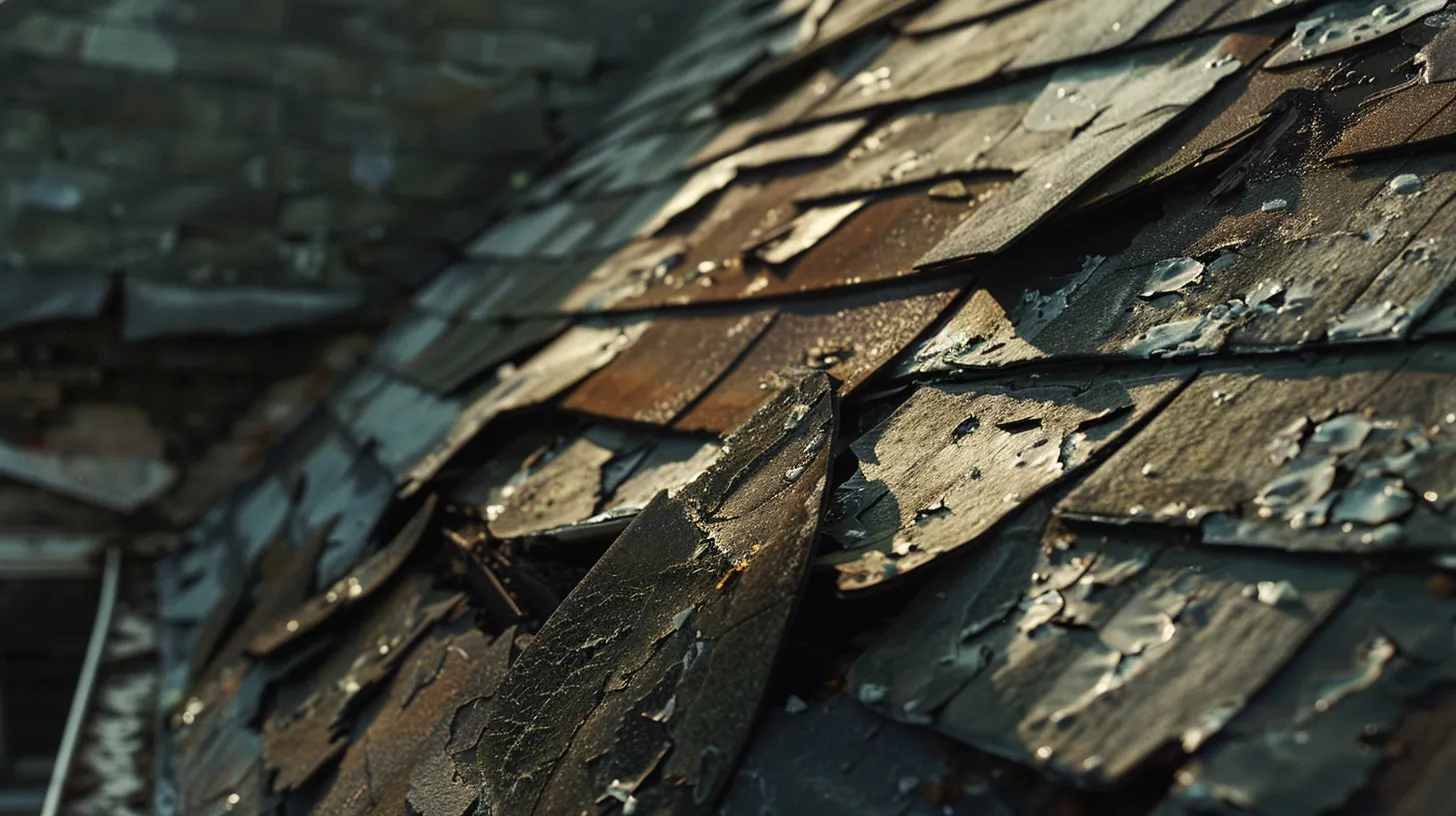
Recognize Signs of Hail Impact
You inspect your roof carefully, noting hail impacts that may have caused micro-fractures in shingles and allow moisture seepage, which can affect roof repairs and your insurance policy, especially when testing the effects of storm damage inspection and wind:
You assess the visible damage from hail and note any loose granules or cracks that suggest further issues. This approach helps you plan roof repairs promptly, preventing more moisture from entering and ensuring that wind impacts do not worsen the problem, thus supporting your storm damage inspection process and insurance policy claims.
Check for Leakage and Water Damage
You should perform a roof inspection after a storm to catch early signs of leakage and water damage that could lead to mildew buildup, affecting both your home’s structure and efficient energy use. This process helps you pinpoint areas where water may seep into the interior, causing potential issues like basement dampness and increased heat loss.
During your inspection, you must check for subtle water stains or soft spots on the roof that can indicate underlying leaks, urging you to take corrective actions promptly. This proactive approach safeguards your home and supports overall energy efficiency while minimizing moisture-related complications that compromise the protective function of your roof.
The storm has left its mark, and you have seen the damage. Now you move forward, inspecting each part of your roof with a careful eye.
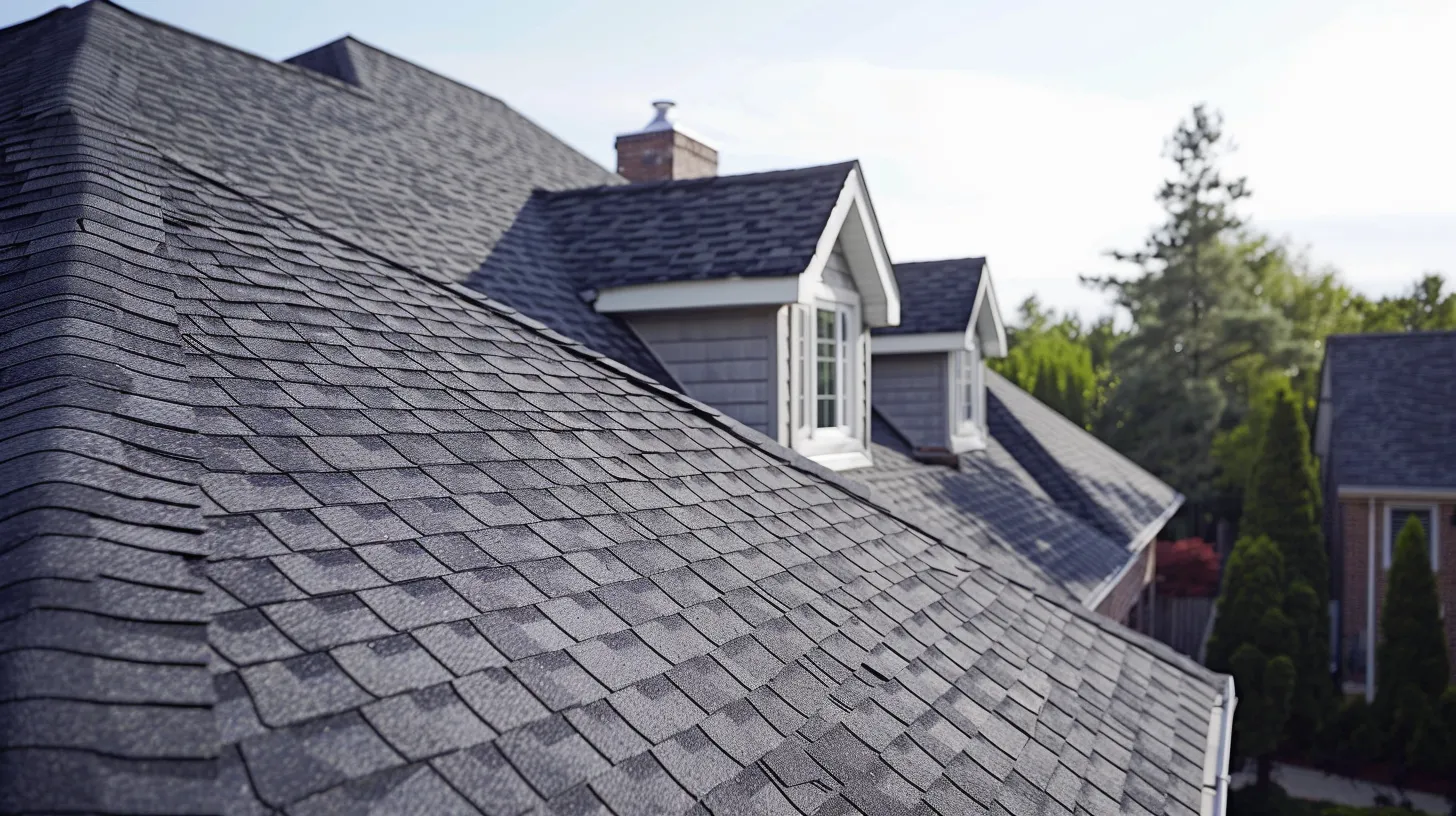
Conducting a Thorough Roof Inspection
You start with safe practices for roof access, checking key areas such as wood shingle conditions and hail impacts. You plan the inspection with proper tools to see any roof damage and avoid hazards. This quick review sets the stage for detailed guidance on inspection areas and roof repair techniques.
Safe Practices for Roof Access
You understand that safe roof access starts with planning and the proper use of equipment, whether you are inspecting a metal roof or a more conventional structure. You check that debris from recent storms is cleared away, reducing the risk of slips and falls, and you schedule regular roof maintenance to prevent issues like excessive depreciation over time.
You begin your inspection by using secure ladders and waiting for weather conditions to change, following these steps:
- Clear the area of loose debris
- Inspect for signs of mold near roof joints
- Secure all necessary safety gear
This method lets you monitor both the integrity of your metal roof and the overall state of your roofing system, ensuring that each step benefits your long-term home protection.
Areas to Inspect Carefully
You need to examine critical spots on your roof while keeping a consistent contract with professional evaluators. For instance, if you have a flat roof, using binoculars to inspect hard-to-reach areas ensures the longevity of your property and minimizes disruptions related to storm chasing results.
You focus on weak links by paying close attention to seams and edge details using simple, practical techniques. This approach allows you to verify that repairs are solid and prevents unnecessary additional inspections when storm chasing becomes an issue, ensuring your roof remains structurally sound and secure.
Tools Needed for Inspection
You rely on the right tools during roof inspections to identify issues with items like chimney and flashing details, ensuring that you can provide accurate assessments for any needed roof replacements. As an inspector, you must use quality equipment such as ladders, protective gear, and measuring tools to check every corner of the roof efficiently.
You benefit from the efficient use of specialized tools while conducting inspections after severe weather, allowing you to pinpoint damage on features like flashing and chimneys. This targeted approach ensures you deliver precise information on whether a roof replacement is necessary, supporting your role as a trusted inspector in managing home repairs.
You finish your roof check and step into the next task. You begin to record each detail the storm has made.
Documenting Roof Condition Post-Storm
You begin by capturing quality photos to record roof storm damage and any wind damage roof issues. You then create a detailed inspection report, noting both immediate and long-term concerns under severe weather conditions. This process helps ensure warranty coverage and identifies potential dam impacts effectively.
Taking Quality Photos of Damage
When you capture quality photos of damage, focus on clear images of every side of your roofs to support your homeowners insurance cover and potential repair needs. Make sure to include shots that show how drainage issues might affect the roof and foundation, offering a complete view of the damage incurred.
You should aim to take photos in good light to reveal subtle cracks and other issues on the roof. These clear images help you document the condition of your property, demonstrating a solid case for maintenance and ensuring that claims are backed by detailed evidence.
Creating a Detailed Inspection Report
You create a detailed inspection report by recording every visible sign of damage, whether you work on a metal or traditional roof. You detail your findings to help homeowners understand necessary repairs and potential deductible issues, making it easier for a roofing contractor to assess the situation accurately.
You document your inspection using clear, dated photos and brief notes that highlight the state of each section of the roof. You include observations on metal components and general wear patterns, ensuring that homeowners receive a concise record that supports their claim and guides further action from a professional roofing contractor.
Noting Immediate and Long-Term Concerns
You check your roof immediately after a storm, noting issues that might affect the ceiling’s insulation and overall energy efficiency. Observing water damage near the attic provides reliable clues for timely repairs, ensuring your property meets your policy requirements and remains safe.
You document both quick fixes and areas that might incur long-term costs if left unattended. Recording details related to energy loss and structural impacts on the attic helps you confirm that your roof remains secure while supporting your insurance policy documentation.
Your record of the storm’s damage speaks for itself. Now, expert advice awaits to guide you forward.
Consulting With Roofing Professionals
You must hire experienced inspectors to assess your roof’s condition. Ask clear questions during the consultation, including details about inspection costs and value. These steps help you understand repair needs better and plan the next actions, ensuring you remain informed throughout the process.
Importance of Hiring Experienced Inspectors
You rely on knowledgeable inspectors who understand the nuances of roof safety and the specific challenges posed by severe weather. You benefit from their deep understanding of roofing structures and attention to detail, ensuring that all crucial damage is recorded accurately and that your home improvement strategy is well-informed.
You trust experienced professionals to guide your repair decisions and optimize the process of managing repairs with your insurance provider. You gain clear insights into the condition of your roof, which helps you plan maintenance effectively and avoid costly future repairs.
Questions to Ask During the Consultation
You ask about the specific damage observations and repair strategies during your consultation. You might question how the inspector records details and what steps they recommend for both immediate fixes and long-term stability:
- Damage documentation methods
- Repair strategy options
- Long-term protection plans
You inquire about the cost details, inspection process, and timeline for any follow-up work required. You seek clear, direct answers that help you understand the overall plan and prepare for any insurance requirements.
Understanding Inspection Costs and Value
You understand that clear pricing and detailed inspection reports provide a strong basis for making informed decisions about your roof’s repairs. You gain practical insights into how inspection costs are structured and what value you can expect from thorough documentation, which assists you in navigating insurance matters.
You realize that investing in a reliable inspection now helps minimize surprises during claim reviews and repair negotiations. You benefit from professional expertise that not only estimates repair expenses accurately but also highlights areas needing urgent attention, ensuring your roof remains secure and well-maintained.
You listen closely to advice and note what needs mending. You then turn your mind to planning the repairs that will keep your roof strong.
Planning for Necessary Roof Repairs
You focus on addressing urgent repair needs first, selecting quality materials that offer lasting protection and planning for regular maintenance after repairs. This approach helps you manage repair costs efficiently, maintain home integrity, and support safe, resilient roofing solutions. Each step plays a key part in ensuring your roof remains secure after severe weather conditions.
Prioritizing Urgent Repairs
You focus on tackling urgent roof repairs first to prevent further damage. You prioritize fixing areas with visible leaks or compromised support to maintain your home’s safety and protect your investment.
You address these critical repairs promptly by consulting with expert contractors who evaluate the roof’s condition thoroughly. You ensure that repair work meets industry standards so that your home remains secure while minimizing future repair expenses.
Choosing Quality Materials for Repairs
You want to select durable materials that withstand severe weather, keeping your roof safeguarded after a storm. You invest in proven products that offer long-term performance and reduce the need for frequent repairs:
You aim to minimize repair costs and extend the lifespan of your roof by choosing materials with strong warranties and solid performance records. You rely on trusted suppliers to provide the quality products that meet the demanding standards of weather-impacted repairs.
Scheduling Timely Maintenance After Repairs
You schedule routine maintenance soon after repairs to keep your roof in top condition and avoid further issues. This timely step gives you a clear record of the repair work and helps maintain your home’s overall safety by detecting any minor issues before they become bigger problems.
You plan regular follow-up inspections and maintenance checks to extend the life of your roof and protect your investment. This proactive approach allows you to address any early signs of wear and maintain consistency in your home improvement strategy, ensuring that your roof continues to offer reliable protection over time.
You mark every repair detail with steady focus. You step into filing claims and handling insurance papers with clear, direct action.
Navigating the Insurance Claim Process
You learn practical steps to file a claim for roof damage, understand what your policy covers for storm damage, and keep an organized record of all correspondence and documentation. Each step builds your confidence in handling the process while ensuring your actions align with your home’s protection and repair needs.
Steps to File a Claim for Roof Damage
You start by gathering all necessary documentation, which includes detailed roof inspection photos, roof repair replacement estimates, and a thorough inspection report. This organized approach supports your claim and gives you a solid base to discuss with your insurance provider.
You then reach out to your insurance agent and follow their claim process carefully, ensuring you provide accurate details about the storm’s impact on your roof. Review the required steps with clarity and record the discussion, such as:
- Contact the insurance provider
- Submit inspection documents
- Obtain repair estimates
This method helps you actively manage the claim process and secure the support needed for roof repairs.
Understanding Policy Coverage Specific to Storm Damage
You must review your insurance policy carefully to understand which types of storm damage are covered and how they apply to your roof. You ask detailed questions during consultations with your insurance agent to ensure that assessments for wind damage, hail impacts, or water leakage from severe weather align with your policy terms.
You find it valuable to compare coverage details with repair costs, so you are informed when submitting a claim after a storm. You clarify any ambiguities in coverage terms with your agent, ensuring that documented damages support your claim and promote prompt and fair compensation.
Keeping Track of All Correspondence and Documentation
You maintain detailed records of all your written communications and inspection reports to support your claim. Every email, letter, and photo you gather builds a clear timeline, making it easier to discuss repairs with your insurance provider while keeping your roof safe and your project on track.
You organize your documents in a central folder so that you can refer back quickly when questions arise. This straightforward tactic saves time and helps you handle the insurance claim process confidently as you work with professionals to restore your roof.
You have walked through each claim step with purpose, bearing witness to every fact laid out. The final section ties it all together and points you toward clear, solid answers.
Conclusion
You check your roof thoroughly after severe weather to confirm that all areas are safe and secure. You rely on professional assessments to identify potential structural issues that may require repair. You feel confident in managing your home repair needs with clear inspection insights.
You inspect key components such as roofing materials and flashings to catch early signs of damage. You use reliable tools to measure any shifts in the roof’s structure. You keep your home safe by addressing any issues promptly.
You document any damage you observe by taking clear photos and detailed notes. You use these records to support your discussions with roofing experts and take informed action. You ensure that every visible concern aligns with your repair strategy.
You consult trusted roofing professionals to review any identified problems and offer sound repair advice. You use organized records and documented evidence to support your insurance discussions. You take practical steps to restore your roof’s integrity and maintain home protection.
Frequently Asked Questions
What key signs indicate roof damage after storms?
After storms, you may spot missing or cracked shingles, sagging areas, water stains inside, or debris near roofing edges, all signaling potential roof damage.
How do you inspect your roof safely after weather events?
After a weather event, observe your roof from a safe distance with binoculars and use a sturdy ladder to check accessible areas. If you see damage or have doubts, contact a trusted roofing professional for a detailed inspection.
What types of storm damage affect roofs most?
Strong winds, heavy rain, and hail can damage your roof by loosening shingles, causing leaks, and denting metal panels. Falling debris from nearby trees adds further risk, affecting the roof’s performance.
How can you document roof condition post-storm effectively?
After a storm, photograph damage clearly, note any missing shingles or debris, record the date and detailed observations, and share this information with professionals for a thorough assessment.
When should you consult a professional for roof repairs?
Consult a professional when you notice missing shingles, leaks, or significant weather damage. A roofing contractor will assess the situation, providing safety and preventing minor issues from becoming costly repairs.
Conclusion
You protect your home by conducting thorough roof inspections after severe weather. You verify the integrity of materials and identify damage from wind, hail, and water. You document all findings clearly to support discussions with your insurance and repair experts. You build a safer home environment by acting promptly on your assessments.